One of the most important and labor intensive steps in creating a quilt is the basting process. Although your quilting could very well not turn out perfect regardless, without a properly basted quilt, it definitely will not be what you had hoped for.
Basting is the process of aligning the top, bottom and middle (batting) of a quilt together so the quilt can be "quilted". (This entire process can be ignored if you will be sending your quilt to a long-arm quilter - lucky you!)
The first step in basting is to select the appropriate materials:
1. Quilt Top - All seams should be ironed to one side or open. The quilt top should be square and should be even enough to lay flat.
2. Quilt Back - If your Quilt Back is pieced (i.e. not a solid piece of fabric) you should iron your seams as you did with the quilt top and consider marking the center of each side of the quilt back and front with a pin. This will allow you to match up the top and bottom and ensure the piecing doesn't turn out crooked. If this is your first time basting, this technique might also help you put the quilt together straight. Your Quilt Back should be about 2 to 4 inches bigger on each side than the Quilt Front.
3. Quilt Middle (Batting) - As I use only 100% cotton fabrics in my quilts I also prefer to use 100% cotton batting. My batting of choice is
Warm and White. When I first started quilting I used a polyester fill which I later found out was better suited for hand quilting. Although the quilts I made turned out just fine, there were puckers in the back and it was absolutely more difficult to work with. Your batting should be about the same size as your Quilt Back, maybe slightly smaller so you can see all of the layers when they are stacked in the quilt sandwich.
4. Basting Pins - Although average safety pins will work just fine, they make special curved pins especially for basting and boy do they work! Depending on the size of the quilt anywhere from 200-300 safety pins should suffice.

5. Crochet Needle or similar instrument - This is used to close the safety pins. Laugh now, but after 200 or so pins your fingers will become quite sore and you will wish you had listened.

6. Packing Tape - To hold the Quilt Back securely in place some people use masking, duct, electrical or painters tape. Use what you are most comfortable with or what you have on hand.

7. A spot to baste on (tile, linoleum, cement, hard surface) - Ideally this space should be large enough for the entire quilt. Basting half a quilt at a time is not only difficult but could also lead to inaccuracies or a mismatched Quilt Back. Be careful if you're working on a linoleum floor as the pins could dig into the floor. I don't mention wood in my list of approved surfaces because I just wouldn't want to put pin holes in your expensive wood floor. As I progress I find I don't hit the floor very often. As a beginner, I really scraped to get through the three layers. I suggest tile if available.

And we begin:
Lay out your Quilt Back on the floor good side facing down. Pulling the Quilt Back tight but not stretching the fabric tape down the corners. I typically will put 1-3 pieces of tape on the sides of the quilt as well so it lays perfectly flat.

Next, lay the batting on top of the Quilt Back. Smooth out any ripples starting in the center moving towards the outside edges. This is my favorite thing about cotton batting, it will lay perfectly smooth.

Next center you Quilt Top on top of the batting good side facing up. Match up the center pins now if you used them. Smooth out any ripples again starting with the center of the quilt moving to the outside.

As you will notice my batting is not as large as my Quilt Back and is barely as large as my Quilt Top. Do as I say, not as I do! This was leftover batting and it just happened to be the right size, just barely!
If you used any light colored fabric in your quilt, then now would be the time to make sure you can't see any loose dark threads through the light fabric. If you can, lift up that portion of the Quilt Top and remove it. Once you baste the quilt it becomes more difficult.

Next I start on one corner of the quilt and make my way around the quilt. I put a safety pin about every 4" making sure to go through all three layers of the quilt sandwich. I stagger the pins to create more coverage. Remember to keep in mind the type of quilting you will be doing. If you will be quilting near the seams put the pins in the center of the blocks. The more pins, the more stable your quilt sandwich, too many pins and you may have a difficult time finding a free spot to quilt.

In addition, I always put pins around the outside of the quilt, you don't want the excess fabric getting in the way.

Once complete, stand back and admire your handiwork.

You might even consider a back massage or hot bath, this is far more work than it appears. Once fully rested, rip up that tape and begin quilting!


 This quilt measures 45" x 58" a good size for a crib. I used a fairly large stipple therefore the quilting took no time at all. I went with a scrappy binding, solid back and random front block placement. For the first time ever I feel that the blocks are truly random, and it feels GREAT!
 And binding...
 I think they both get very jealous of the amount of time I spend quilting. The entire time I am making one Daisy runs around trying to lay on it (at least she has the right idea).
 Sometimes I feel as though every time I make a quilt I have to learn how to stipple, baste and bind all over again. It would be great if I had a reference somewhere I could quickly look to when I got confused (which happens pretty often). In addition, I have a lot of family and friends that read my blog with little quilting knowledge.
  Aside from being a good reference point for me this will also solve a lot of those "how do you make a quilt questions?" So as I finished this quilt I stopped to consider "how" I was finishing it.
 I was lucky enough to have someone teach me some of these techniques first hand, other bits I learned from reading blogs and looking through books. So my hope is that my tutorials can help someone else learn to quilt and along the way teach them the many joys of my favorite crafting project.


 I created this scarf using a ladder as my muse:
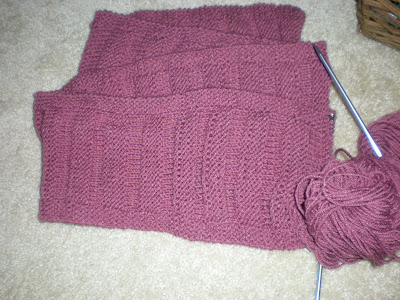 From there I inspired myself to create my first afghan using the same technique.
  It has a checkered design, knit 10, pearl 10 and I started it about 2 years ago. The amount of time and concentration required to knit one throw blanket is immense, it makes me really appreciate quilting and my sewing machine!
 I won't even tell you how long it takes me to get from one side of this afghan to the other! Regardless I continue to knit day after day, you know why? Because hard, labor-intensive work builds character, or at least that's what I tell myself!

 In the picture above there is a lot of planning, cutting, staring and thinking going on.
 I had the colors all picked out for a few months, ever since I bought that patterned center fabric. It's one of those inspirational fabrics that makes you want to design a quilt around it. And lucky me,


